Repair Procedures: Disassembly
- Remove the rear cover (A) after removing nuts (B).
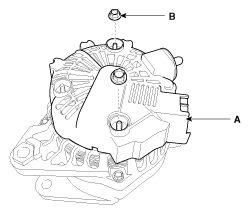 Courtesy of HYUNDAI MOTOR AMERICA
- Remove the mounting bolts (A) and the regulator assembly (B).
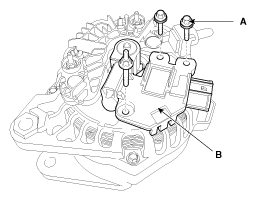 Courtesy of HYUNDAI MOTOR AMERICA
- Remove the slip ring guide (A) after pulling it.
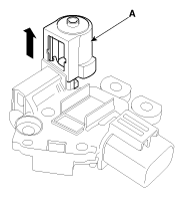 Courtesy of HYUNDAI MOTOR AMERICA
- Remove the OAD (Overrunning Alternator Decoupler) cap.
NOTE:
- When installing, replace with new OAD cap.
- Remove the OAD (Overrunning Alternator Decoupler) pulley (A) using the special tool.
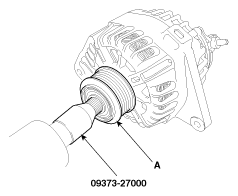 Courtesy of HYUNDAI MOTOR AMERICA
- Unsolder the 3 stator leads (A).
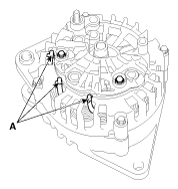 Courtesy of HYUNDAI MOTOR AMERICA
- Remove the 4 through bolts (A).
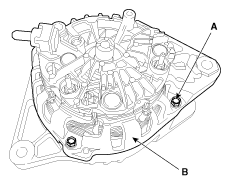 Courtesy of HYUNDAI MOTOR AMERICA
- Disconnect the rotor (A) and housing (B).
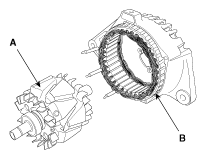 Courtesy of HYUNDAI MOTOR AMERICA