Real Time AWD Control Unit Initialization
Real Time AWD Control Unit Initialization
Procedure
NOTE:
* Whenever the real time AWD control unit is replaced, it must be initialized.
* Park the vehicle on a flat and level surface.
1. HDS DLC - Connection
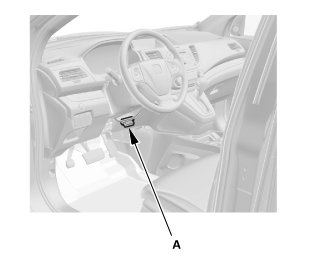
1. Connect the HDS to the data link connector (DLC) (A) located under the driver's side of the dashboard.
2. Turn the ignition switch to ON (II).
3. Make sure the HDS communicates with the vehicle. If it does not communicate, go to the DLC circuit troubleshooting.
2. Real Time AWD Control Unit Initialization
1. Select the ADJUSTMENT in the REAL TIME AWD SYSTEM with the HDS.
2. Select the ECU REPLACEMENT in the ADJUSTMENT with the HDS.
NOTE: See the HDS Help menu for specific instructions.